Tuesday, June 27, 2017

Processing the Airline dataset with AWS Athena

AWS Athena is a interactive query engine to process the data in S3. Athena is based on Presto which was developed by Facebook and then open sourced. With Athena there is no need to start a cluster, spawn EC2 instances. Simply create a table, point it to the data in S3 and run the queries.

In the previous blog, we looked at converting the Airline dataset from the original csv format to the columnar format and then run SQL queries on the two data sets using Hive/EMR combination. In this blog we will process the same data sets using Athena. So, here are the steps.

Step 1 : Go to the Athena Query Editor and create the ontime and the ontime_parquet_snappy table as shown below. The DDL queries for creating these two tables can be got from this blog.


Step 2 : Run the query on the ontime and the ontime_parquet_snappy table as shown below. Again the queries can be got from the blog mentioned in Step 1.


Note that, for processing the csv data it took 3.56 seconds and 2.14 GB of S3 data was scanned. For processing the Parquet Snappy data it took 3.07 seconds and 46.21 MB of S3 data was scanned.

There is not a significant time difference running the queries on the two datasets. But, Athena pricing is based on the amount of data scanned in the S3. So, the cost is significantly less to process the Parquet Snappy data than the csv data.

Step 3 : Go to the Catalog Manager and drop the tables. Dropping them will simply delete the table definition, but not associated data in S3.


Just out of curiosity I created the two tables again and run a different query this time. Below are the queries with the metrics.
select distinct(origin) from ontime_parquet_snappy;
Run time: 2.33 seconds, Data scanned: 4.76MB

select distinct(origin) from ontime;
Run time: 1.93 seconds, Data scanned: 2.14GB

As usual the there is not much difference in the time taken for the query execution, but the amount of data scanned in S3 for the Parquet Snappy data is significantly lower. So, the cost to run the query on the Parquet Snappy format data is significantly less.

Friday, June 23, 2017

Algorithmia - a store for algorithms, models and functions

I came across Algorithmia a few months back and didn't get a change to try it out. Again it came into focus with a Series A funding of $10.5M. More about the funding here.

Algorithmia  is a place where algorithms, models or functions can be discovered and be used for credits which we can buy. We get 5,000 credits every month for free. For example if a model costs 20 credits, then it can be called 250 times a month.

Create a free account here and get the API key from the profile. Now we should be able to call the different models using different languages like Python, Java, R and commands like curl. Below are the curl commands to do a sentimental analysis on a sentence. Make sure to replace the API_KEY with your own key.

curl -X POST -d '{"sentence": "I really like this website called algorithmia"}' -H 'Content-Type: application/json' -H 'Authorization: Simple API_KEY' https://api.algorithmia.com/v1/algo/nlp/SocialSentimentAnalysis

{"result":[{"compound":0.4201,"negative":0,"neutral":0.642,"positive":0.358,"sentence":"I really like this website called algorithmia"}],"metadata":{"content_type":"json","duration":0.010212005}}

curl -X POST -d '{"sentence": "I really dont like this website called algorithmia"}' -H 'Content-Type: application/json' -H 'Authorization: Simple API_KEY' https://api.algorithmia.com/v1/algo/nlp/SocialSentimentAnalysis

{"result":[{"compound":-0.3374,"negative":0.285,"neutral":0.715,"positive":0,"sentence":"I really dont like this website called algorithmia"}],"metadata":{"content_type":"json","duration":0.009965723}}
Algorithmia is more like a Google Play Store and Apple App Store, where individuals and companies can upload mobile applications and rest of us can download the same. It's an attempt to democratize Artificial Intelligence and Machine Learning.

Here is a service to convert the black and white to color images.

Monday, June 19, 2017

Converting Airline dataset from the row format to columnar format using AWS EMR

To process Big Data huge number of machines are required. Instead of buying them, it's better to process the data in the Cloud as it provides lower CAPEX and OPEX costs. In this blog we will at processing the airline data set in the AWS EMR (Elastic MapReduce). EMR provides Big Data as a service. We don't need to worry about installing, configuring, patching, security aspects of the Big Data software. EMR takes care of them, just we need specify the size and the number of the machines in the cluster, the location of the input/output data and finally the program to run. It's as easy as this.

The Airline dataset is in a csv format which is efficient for fetching the data in a row wise format based on some condition. But, not really efficient when we want to do some aggregations. So, we would be converting the CSV data into Parquet format and then run the same queries on the csv and Parquet format to observe the performance improvements.

Note that using the AWS EMR will incur cost and doesn't fall under the AWS free tier as we would be launching not the t2.micro EC2 instances, but a bit bigger EC2 instances. I will try to keep the cost to the minimum as this is a demo. Also, I prepared the required scripts ahead and tested them in the local machine on small data sets instead of the AWS EMR. This will save the AWS expenses.

So, here are the steps

Step 1 : Download the Airline data set from here and uncompress the same. All the data sets can be downloaded and uncompressed. But, to keep the cost to the minimum I downloaded the 1987, 1989, 1991, 1993 and 2007 related data and uploaded to S3 as shown below.


Step 2 : Create a folder called scripts and upload them to S3.


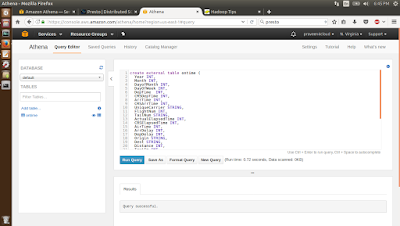
The '1-create-tables-move-data.sql' script will create the ontime and the ontime_parquet_snappy table, map the data to the table and finally move the data from the ontime table to the ontime_parquet_snappy table after transforming the data from the csv to the Parquet format. Below is the SQL for the same.
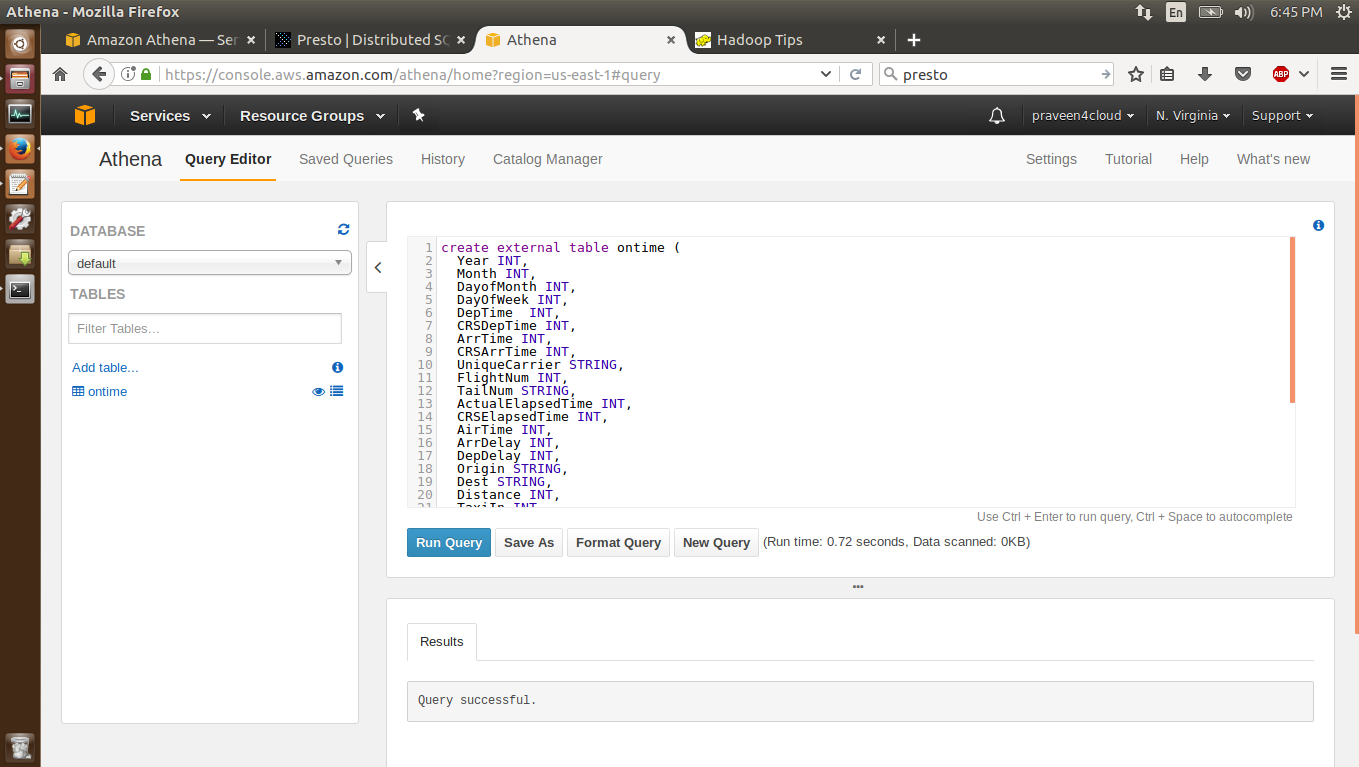
create external table ontime (
  Year INT,
  Month INT,
  DayofMonth INT,
  DayOfWeek INT,
  DepTime  INT,
  CRSDepTime INT,
  ArrTime INT,
  CRSArrTime INT,
  UniqueCarrier STRING,
  FlightNum INT,
  TailNum STRING,
  ActualElapsedTime INT,
  CRSElapsedTime INT,
  AirTime INT,
  ArrDelay INT,
  DepDelay INT,
  Origin STRING,
  Dest STRING,
  Distance INT,
  TaxiIn INT,
  TaxiOut INT,
  Cancelled INT,
  CancellationCode STRING,
  Diverted STRING,
  CarrierDelay INT,
  WeatherDelay INT,
  NASDelay INT,
  SecurityDelay INT,
  LateAircraftDelay INT
) ROW FORMAT DELIMITED FIELDS TERMINATED BY ',' LOCATION 's3://airline-dataset/airline-csv/';

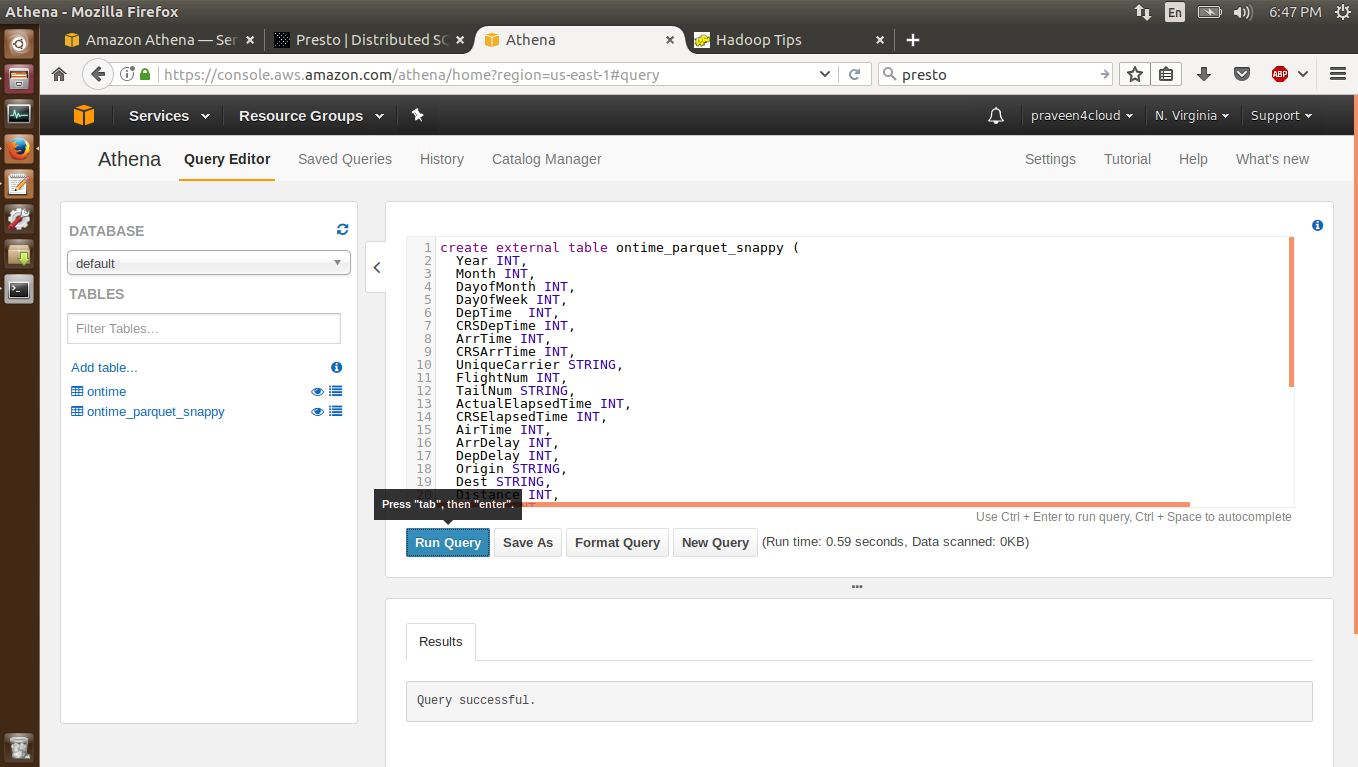
create external table ontime_parquet_snappy (
  Year INT,
  Month INT,
  DayofMonth INT,
  DayOfWeek INT,
  DepTime  INT,
  CRSDepTime INT,
  ArrTime INT,
  CRSArrTime INT,
  UniqueCarrier STRING,
  FlightNum INT,
  TailNum STRING,
  ActualElapsedTime INT,
  CRSElapsedTime INT,
  AirTime INT,
  ArrDelay INT,
  DepDelay INT,
  Origin STRING,
  Dest STRING,
  Distance INT,
  TaxiIn INT,
  TaxiOut INT,
  Cancelled INT,
  CancellationCode STRING,
  Diverted STRING,
  CarrierDelay INT,
  WeatherDelay INT,
  NASDelay INT,
  SecurityDelay INT,
  LateAircraftDelay INT
) STORED AS PARQUET LOCATION 's3://airline-dataset/airline-parquet-snappy/' TBLPROPERTIES ("orc.compress"="SNAPPY");

INSERT OVERWRITE TABLE ontime_parquet_snappy SELECT * FROM ontime;
The '2-run-queries-csv.sql' script will run the query on the ontime table which maps to the csv data. Below is the query.
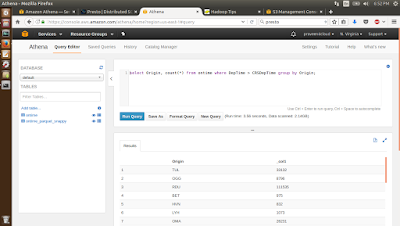
INSERT OVERWRITE DIRECTORY 's3://airline-dataset/csv-query-output' select Origin, count(*) from ontime where DepTime > CRSDepTime group by Origin;
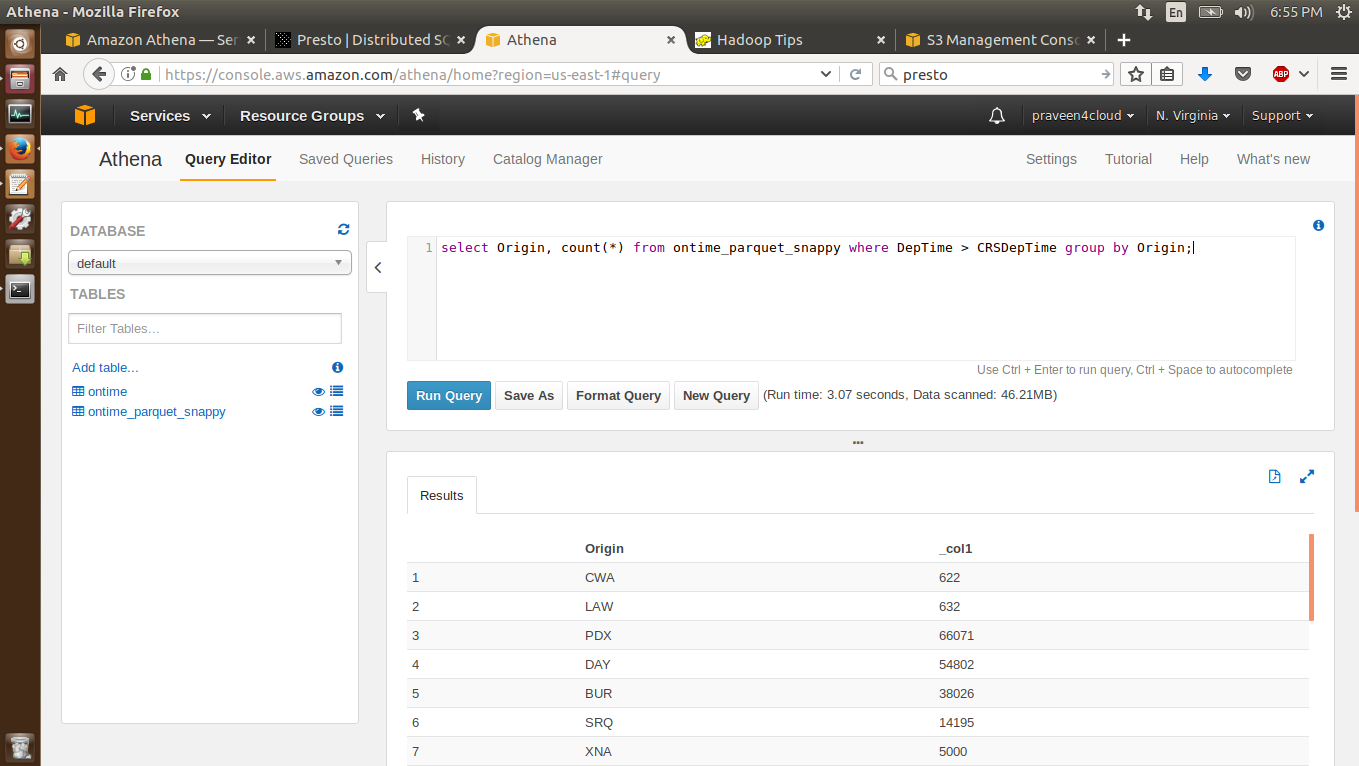
The '3-run-queries-parquet.sql' script will run the query on the ontime_parquet_snappy table which maps to the Parquet-Snappy data. Below is the query.
INSERT OVERWRITE DIRECTORY 's3://airline-dataset/parquet-snappy-query-output' select Origin, count(*) from ontime_parquet_snappy where DepTime > CRSDepTime group by Origin;
Step 3 : Goto the EMR management console and click on the 'Go to advanced options'.


Step 4 : Here select the software to be installed on the instances. For this blog we need Hadoop 2.7.3 and Hive 2.1.1. Make sure these are selected, the rest are optional. Here we can add a step. According to the AWS documentation, this is the definition of Step - 'Each step is a unit of work that contains instructions to manipulate data for processing by software installed on the cluster.'. This can be a MR program, Hive Query, Pig Script or something else. The steps can be added here or later. We will add steps later. Click on Next.


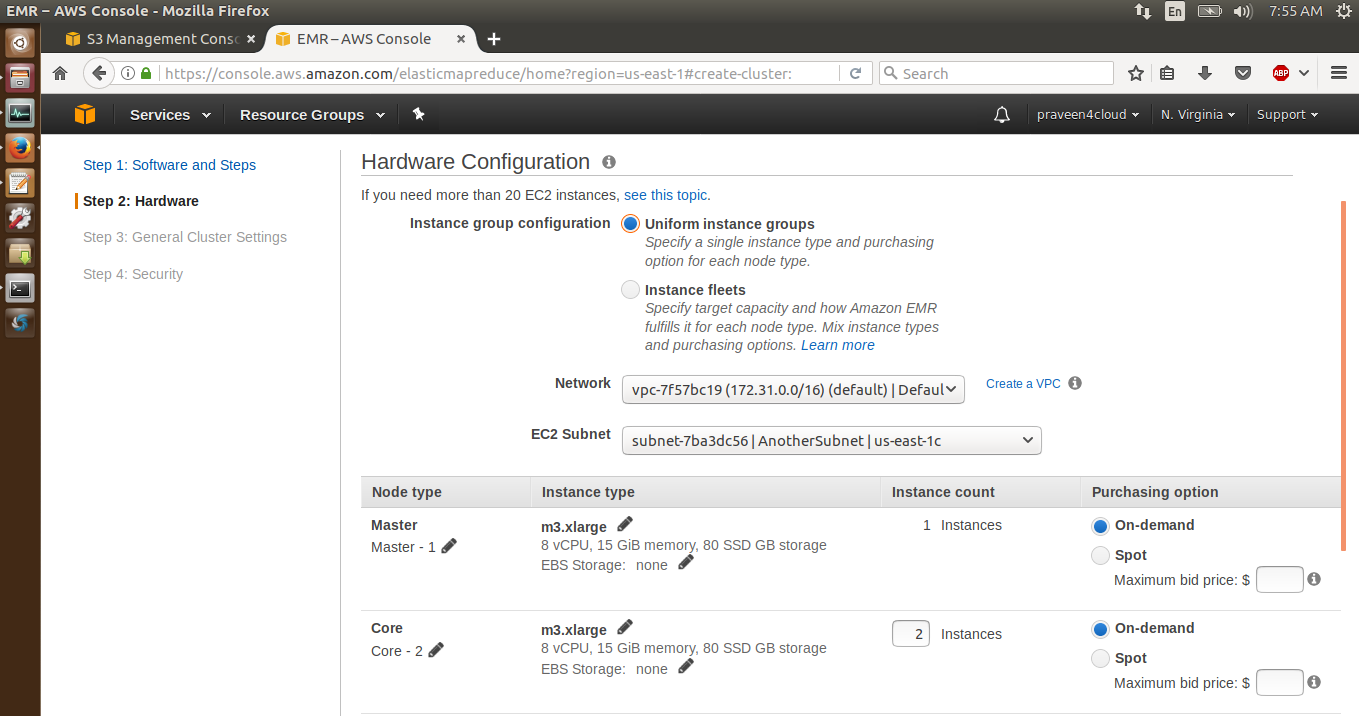
Step 5 : In this step, we can select the number of instances we want to run and the size of each instance. We will leave them as default and click on next.


Step 6 : In this step, we can select additional settings like the cluster name, the S3 log path location and so on. Make sure the 'S3 folder' points to the log folder in S3 and click on Next. Uncheck the 'Termination protection' option.


Step 7 : In this screen again all the default options are good enough. If we want to ssh into the EC2 instances then the 'EC2 key pair' has to be selected. Here are the instructions on how to create a key pair. Finally click on 'Create cluster' to launch the cluster.


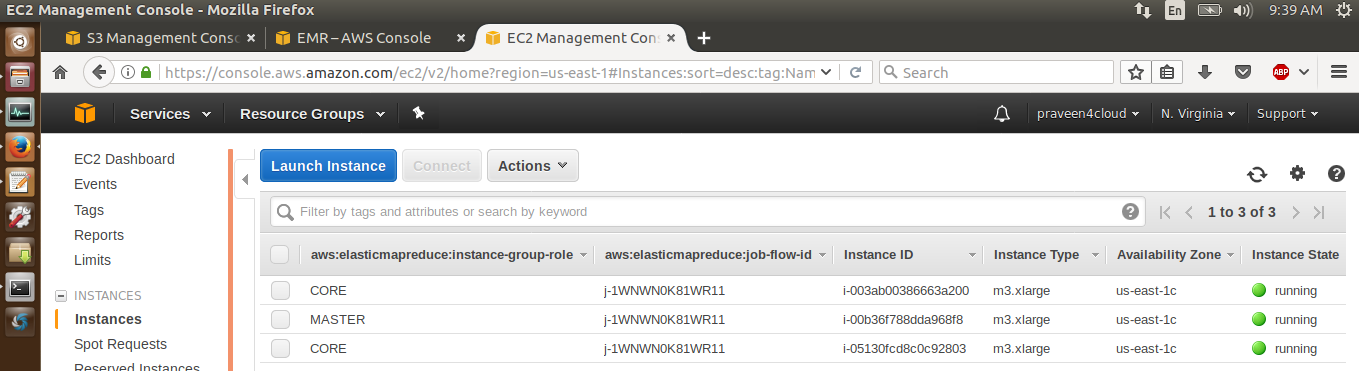
Initially the cluster will be in a Starting state and the EC2 instances will be launched as shown below.


Within a few minutes, the cluster will be in a running state and the Steps (data processing programs) can be added to the cluster.


Step 8 : Add a Step to the cluster by clicking on the 'Add step' and pointing to the '1-create-tables-move-data.sql' file as shown below and click on Add. The processing will start on the cluster.


The Step will be in a Pending status for some time and then move to the Completed status after the processing has been done.


Once the processing has been complete the csv data will be converted into a Parquet format with Snappy compression and put into S3 as shown below.


Note that the csv data was close to 2,192 MB and the Parquet Snappy data is around 190 MB. The Parquet data is in columnar format and provides higher compression compared to the csv format. This enables to fit more data into the memory and so quicker results.

Step 9 : Now add 2 more steps using the '2-run-queries-csv.sql' and the '3-run-queries-parquet.sql'. The first sql file will run the query on the csv data table and the second will run the query on the Parquet Snappy table. Both the queries are the same, returning the same results in S3.

Step 10 : Check the step log files for the steps to get the execution times in the EMR management console.

Converting the CSV to Parquet Snappy format - 148 seconds
Executing the query on the csv data - 90 seconds
Executing the query on the Parquet Snappy data - 56 seconds

Note that the query runs faster on the Parquet Snappy data, when compared to the csv data. I was expecting the query to run a bit faster, need to look into this a bit more.

Step 11 : Now that the processing has been done, it's time to terminate the cluster. Click on Terminate and again on Terminate. It will take a few minutes for the cluster to terminate.


Note that the EMR cluster will be terminated and EC2 instances will also terminate.


Step 12 : Go back to S3 management console the below folders should be there. Clean up by deleteing the bucket. I would be keeping the data, so that I can try Athena and RedShift on the CSV and the Parquet Snappy data. Note that 5GB of S3 data can be stored for free upto one year. More details about the AWS free tier here.


In the future blogs, we will look at processing the same data using AWS Athena. With Athena there is no need to spawn a cluster, so the serverless model. AWS Athena will automatically spawn the servers. We simply create a table, map it to the data in S3 and run the SQL queries on it.

With the EMR the pricing is rounded to the hour and for executing a query about 1 hour and 5 minutes, we need to pay for complete 2 hours. With Athena we pay by the amount of the data scanned. So, changing the data into a columnar format and compressing it, will not only make the query run a bit faster, but also cut down the bill.

UpdateHere and here are articles from the AWS documentation on the same. It has got some additional commands.

Update : Here is an approach using Spark/Python on EMR for converting the row format to Columnar format.

Friday, June 16, 2017

GCP for AWS Professionals

As many of you know I had been working with AWS (public Cloud from Amazon) for quite some time and so I thought of getting my feet wet with GCP (public Cloud from Google). I tried to find some free (????) MOOC around GCP and didn't find many.

Google partnered with Coursera and started a MOOC on the GCP fundamentals. It covers the different GCP fundamentals at a very high level with a few demos. Here is the link for the same. There is also documentation from Google comparing the GCP and the AWS platform here.

As I was going through the above mentioned MOOC, I could clearly map many of the GCP services with the AWS services which I am more comfortable with. Here is the mapping between the different GCP and the AWS services. The mappings are really helpful for those who are comfortable with one of the Cloud platform and want to get familiar with the other.

AWS provides free resources for the developer to get more familiar and to get started with their platform. Same is the case with GCP, a 300$ credit which is valid for 1 year is provided. Both the Cloud vendors provide a few services for free for the first year and there are some services will are free life long with some usage limitations.

Maybe it's my perspective, but the content around AWS seems to be much more robust and organized when compared to the GCP documentation. Same is the case with the Web UI also. Anyway, here is documentation for AWS and here is the documentation for AWS.

Happy clouding.

AWS Lambda with Serverless framework

Google CloudFunction, IBM OpenWhisk, Azure Functions and AWS Lambda allow building applications in a Serverless fashion. Serverless doesn't mean that there is no server, but the Cloud vendor takes care of the provisioning the servers, scaling them up and down as required. In the Serverless model all we have to do is author a function with the event that triggers and the function and the resources the function uses.

Since, no servers are being provisioned there is no constant cost. The cost is directly proportional to the number of times the particular function is called and the amount of resources it consumes. This model is useful as for a startup with limited resources or for a big company who want to deploy the applications quickly.

Here is a nice video form the founder of aCloudGuru on how they built their entire business on Serverless Architecture. Here is a nice article/tutorial from AWS on using Lambda function to shrink the image uploaded to S3 bucket.


In the above workflow as soon as a image is uploaded to S3 Source Bucket, it will fire an event and call the Lambda function. The function will shrink the image and then put it in the S3 Target Bucket. In this scenario, there is no sustained cost associated as we pay based on the number of times the function is called and the amount of resources it consumes.

For the last few days I was intrigued by the Serverless architecture and had been trying the use cases mentioned in AWS Lambda documentation here. It was fun, but not pretty straight forward or as simple as uploading a function. The function has to be authored, packaged, uploaded, set the permissions for the event/resources, test the Lambda and finally integrate with the API Gatway. oooops. It's not an impossible task, but definitely tedious. Good that I haven't mentioned the debugging of the Lambda functions, which is really a pain.

For the rescue is the Serverless framework which makes working with the Lambda functions easy. Setting up the Serverless frameowork on Ubuntu was a breeze. Creating a HelloWorld Lambda function in AWS with all the required dependencies was even easier.

Note that the Serverless framework supports other platforms besides AWS. But, in the this blog I will provide some screen shots with a brief write-up on the same. Here, I go with the assumption that Serverless framework and all the dependencies like NodeJS, integration with the AWS Security Credentials has been done.

So, here are the steps.

Step1: Create the skeleton code and the Serverless Lambda configuration file.


Step 2: Deploy the code to AWS using the CloudFormation.

 
Once the deployment has been complete, the AWS resources will be created as shown below in the CloudFormation console.


As seen in the below screen, the Lambda function also gets deployed.


Step 3 : Now is the time to invoke the Lambda function again using the Serverless framework as shown below.


In the Lambda management console, we can observe that the Lambda function was called once.


Step 4 : Undeploy the Lambda function using Serverless framework.


The CloudFormation stack should be removed and all the associated resources should be deleted.


These completes the steps for a simple demo of the Serverless framework. A couple of things to note that we simply uploaded a Python function to the AWS Cloud and never created a server and so the Serverless Architecture. Here a few more resources to get started with Serverless Architecture.

On a side note I was really surprised that the Serverless framework has been started by CocaCola and then at some point of time they decided to open source in Github. All the time it was companies like Facebook, Google, Twitter, LinkedIn, Netflix, Microsoft :) opening the internal software to the public, but this was the first time I saw something from CocaCola.

Maybe I should drink more CocaCola and promote them to publish such cool frameworks.