Cloud services either from Amazon, Google, RackSpace or in fact from any other vendor allows to get access to infrastructure easily and quickly without much of CAPEX or OPEX costs. Recently, there was an nice blog from Cloudera on setting up a CDH cluster on Amazon EC2. Amazon provides a lot of cloud services, of which EC2 provides elastic compute in the cloud. We would be using AWS EC2 to setup a CDH cluster.
Although the Cloudera blog is easy to follow, there were very few screen shots which makes it for those who are getting started with AWS a bit hesitant to start with. So, this blog is more about adding more details to the Cloudera blog.
Actual setting up of the cluster on EC2 takes less than 20 minutes. It took me an hour or so because of doing it for the first time. Also, the cluster can be created from any OS and I have tried from a Ubuntu 12.04 machine.
The first step is to register for AWS here, it requires a credit card and some other details. AWS charges based on the resources used. And for using a two node Hadoop cluster (with the minimum requirements) along with an instance for the Cloudera Manager for two hours, the cost is around 1$. One important thing to note with any cloud service is to terminate the instances once done or else the cloud provider will continue the billing.


Voila the Hadoop cluster is up and running in a couple of minutes.
Although the Cloudera blog is easy to follow, there were very few screen shots which makes it for those who are getting started with AWS a bit hesitant to start with. So, this blog is more about adding more details to the Cloudera blog.
Actual setting up of the cluster on EC2 takes less than 20 minutes. It took me an hour or so because of doing it for the first time. Also, the cluster can be created from any OS and I have tried from a Ubuntu 12.04 machine.
The first step is to register for AWS here, it requires a credit card and some other details. AWS charges based on the resources used. And for using a two node Hadoop cluster (with the minimum requirements) along with an instance for the Cloudera Manager for two hours, the cost is around 1$. One important thing to note with any cloud service is to terminate the instances once done or else the cloud provider will continue the billing.
- Get the `Access Key ID` and `Secret Access Key` and store it in a notepad. The keys will be used when creating EC2 instances. If not there, then generate a new set of keys.

- Go to the EC2 Management console and create a new Key Pair. While creating the keys, the user will be prompted to store a pem key file. This file will be used to login to the EC2 instance later to install the Cloudera Manager.

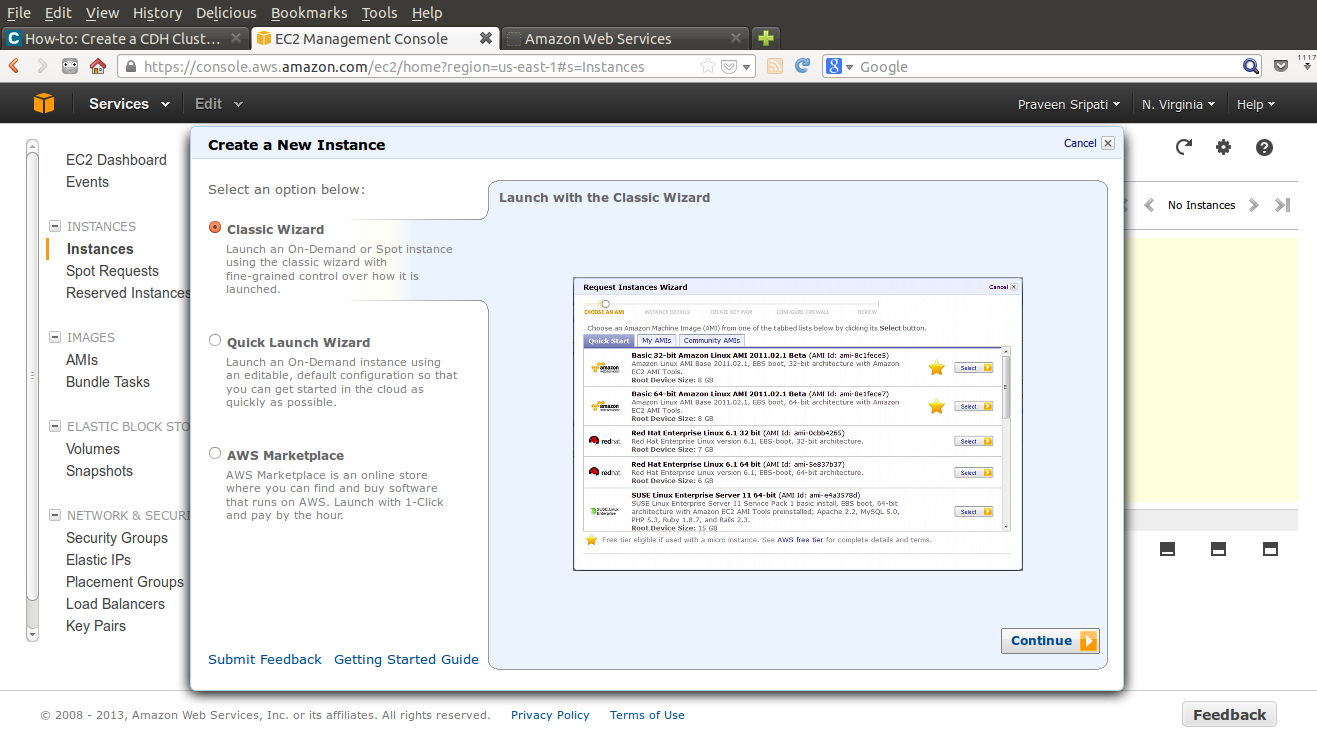
- In the same screen, go to Instances and click on `Launch Instance` to select an EC2 instance to launch.

- Keep all the default options and click on `Continue`.
- Select `Ubuntu 12.04.01 LTS` and click on `Select`. This is the instance on which the Cloudera Manager would be running. The Cloudera Manager later will used to setup the CDH cluster and also manage it.

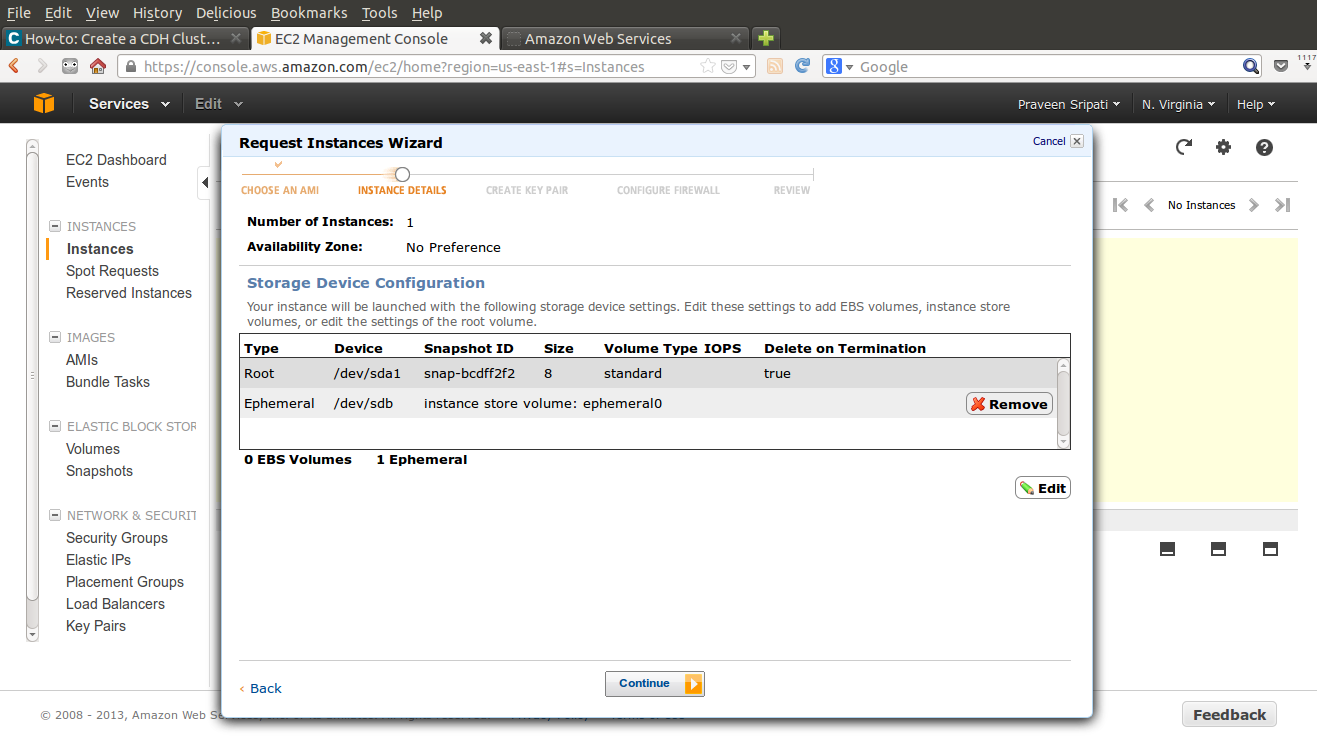
- Select the `Number of Instances` as 1 and the `Instance Type` as `m1.large`.

- Use the default options in the below screen.

- Use the default options in the below screen.
- Use the default options in the below screen.

- Select `Choose from the existing Key Pairs` and select the Key Pairs which was created earlier.

- Select `Create a new Security Group` and open up the ports as shown in the below screen.

- Make sure all the setting are proper and click on `Launch`.

- The below confirmation screen will appear, click on close.

- It will take a couple of minutes for the EC2 instance to start. The status of the instance should change to `running`. Select the instance and copy the public hostname of the instance which we created.

- Use the key which has been downloaded earlier and the public hostname to login to the instance which was created. Password shouldn't be prompted for logging into the instance.

- Download the Cloudera Manager installation binaries, change the permissions. Execute the binary to start the installation of Cloudera Manager using sudo.

- Click on `Next`.

- Click on `Next`.

- Click on `Next`.

- The installation will take a couple of minutes.

- Once the installation of the Cloudera Manager is complete, the following screen will appear. Click on `OK`.

- Start Firefox and go to the hostname:7180 (the hostname has to be replaced) and login to the Cloudera Manager using username/password as admin/admin. Noticed that it takes a couple of seconds the Cloudera Manager for the initialization, so the login page might not appear immediately.

- Click on `Continue`.

- Select the OS for the Hadoop Nodes, the number of Hadoop nodes and the instance types. Notice that the cluster has the same instance types for both the master and the slaves.

- Enter the `Access Key ID` and `Secret Access Key` which we got in the earlier step. For the rest, choose the default options.

- Verify the settings and click on `Start Installation`.

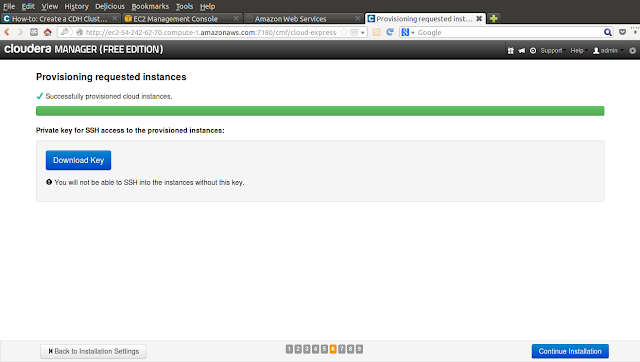
- It will take a couple of minutes to provision the EC2 instances.

- Download the key and save it. The key can be used to login to the one of the Hadoop instances.

- After the EC2 instances are provisioned, now is the time for the installation and configuration of the Big Data related software on all the nodes.
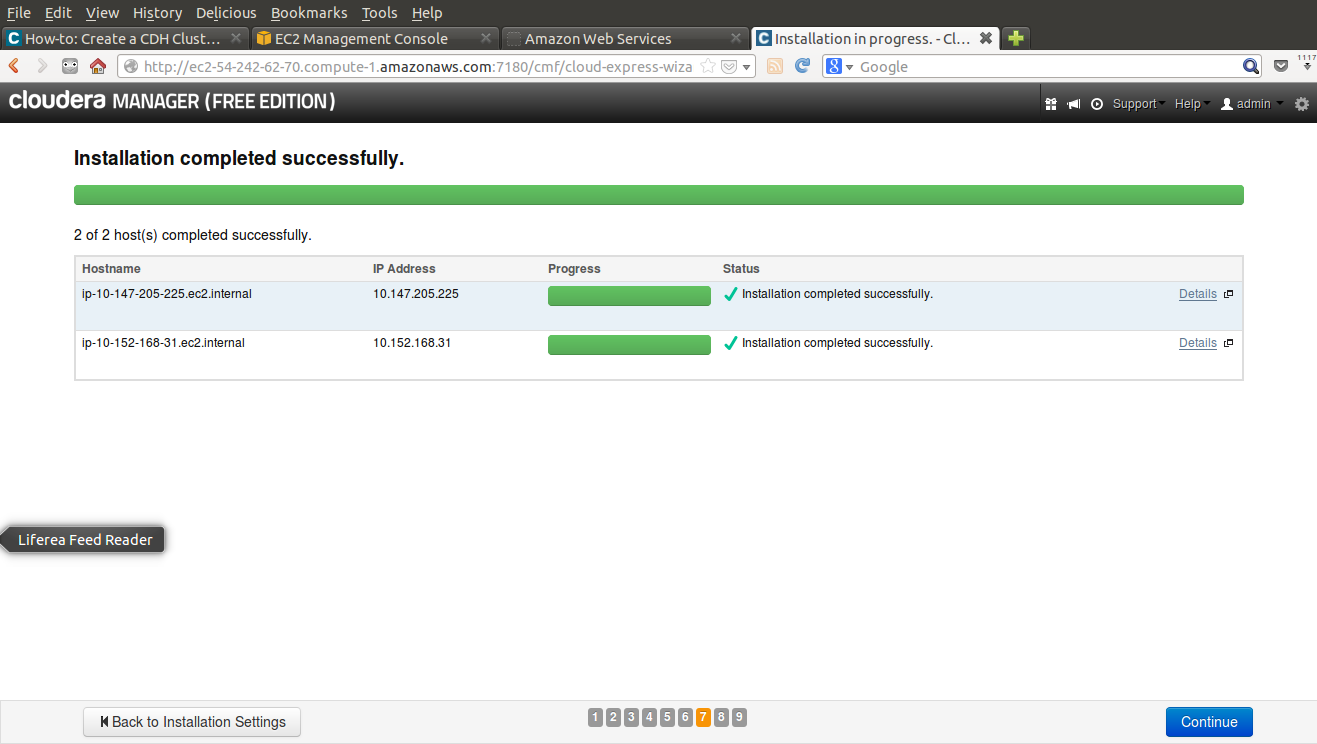
- The nodes are automatically checked. Make sure all the validations pass through.

- Now the different services will start automatically. Again, this will take a couple of minutes.

- Click on the `Services` tab and all the services should be in a Good Health status. From this screen either the individual or all the services can stopped/started.

- Click on the Hosts tab to get the list of nodes and their status which should be in Good.

- Check the HDFS console on port 50070.

- Check the MapReduce console on port 50030.

- Go back to the `EC2 Management Console` and there should be one instance for the Cloudera Manager and based on the number of Hadoop nodes, there will be additional nodes.
- Login to the Hadoop instance using the below command (the hostname has to be changed) and then upload files into HDFS and run MapReduce jobs.
ssh -i cm_cloud_hosts_rsa ec2-user@ec2-184-72-169-149.compute-1.amazonaws.com
- Once done with the Hadoop cluster make sure to select all the instances and select `Terminate` in the actions tab.

Voila the Hadoop cluster is up and running in a couple of minutes.
This is really amazing....!!!
ReplyDeleteOn this screenshot: "Select the OS for the Hadoop Nodes, the number of Hadoop nodes and the instance types. Notice that the cluster has the same instance types for both the master and the slaves."
ReplyDeleteYou chose Centos for the node OS and m1.medium. Any reason you did not stay with Ubuntu and m1.large?
The bigger the size of the VM the more I need to Amazon :). Also, Implala doesn't run on Ubuntu, so I picked CentOS.
DeleteFollowed your instructions to the letter, and still get the following:
Deletehbase1 bad health
hdfs1 bad health
hive1 good health
hue1 good health
impala1 bad health
mapreduce1 bad health
oozie1 good health
sqoop1 good health
zookeeper1 bad health
mgmt1 bad health
For a first-timer, figuring out how to get from bad health to good health was not very intuitive. Any suggestions?
Btw, tried half a dozen times from scratch, even tried m1.large, no difference.
DeleteWarren,
DeleteHow many nodes are there in your cluster? ideally, HDFS should have 3 nodes. This could be the reason for HDFS bad health.
S
Sudhakar,
DeleteThere were 4 nodes in the cluster.
W
Hi Praveen,
ReplyDeleteI installed amazon aws and when i run the following command
ssh -i CDHKeyPair.pem ubuntu@ec2-xx-xx-xx-xx.compute-1.amazonaws.com
i am getting error like connect to host ec2-xx-xx-xx-xx.compute-1.amazonaws.com port 22: Connection timed out.
do i have to install cloudera again in ec2 after terminating instance ?
ReplyDeleteThis works , I installed through aws , ec2 and get only once instance only , altogther 2 instances and is working perfectly fine, I choose medium instance 4GB of RAM , it takes time but works fine . I also later added nodes to the clusters later another two nodes and it turns out to be perfeclty fine.
ReplyDelete