Within AWS we can create multiple resources like EC2, S3, RDS, Lambda etc. After creating the resources, the permissions should be given appropriately. Lets say, we have two servers for Production and two servers for Development, then the users in the Production Group should have the access to the Production Servers and the users in the Development Group should have access to the Development Servers and not the other way. By permission, it can be to view, stop, start, terminate, reboot etc.

The same can be achieved using the AWS Service "Identity and Access Management" along with Tags as show in the above diagram.Tags are meta data attached to AWS resources like EC2. Tags have keys and values. For ex., Key can be Env and Value can be Production. We should be able to Tag EC2 instances as Env=Production and give the permissions for Production Group to only the EC2 which have the Tag Env=Production and skip the rest of the EC2.
Here are the steps for the above at a high level.
1) Create an IAM User with no policies attached
2) Create a Policy with the appropriate permissions
3) Create a Group and attach the above Policy to it
4) Add the User to the Group
5) Create two EC2s with the appropriate tags
6) Login as the IAM User and check the actions allowed on the EC2
Sequence of steps for setting up access to EC2 Access
Step 1: Create an IAM User
Step 1.1: Go to the IAM Management Console, Click on the Users tab in the left pane and click on "Add User".

Step 1.2: Enter the user name and make sure to select "AWS Management Console Access". Click on "Next Permissions".

Step 1.3: We would be adding the permissions later, for now click on "Next: Tags".

Step 1.4: Tags are optional for a user. So, click on "Next: Review".

Step 1.5: Make sure the user details are proper and click on "Create user". The IAM User will be created as shown in the below screen.


Step 2: Create a policy with the appropriate permissions
Step 2.1: Click on the policies in the left pane and click on "Create policy".

Step 2.2: Click on the JSON tab, enter the below policy and click on "Review policy". The below JSON gives the permission to Stop/Start EC2 instances with a Tag Env=Production, while viewing the description for all the EC2 instances is allowed. The policy was got from here and modified. Here are a lot of sample policies from AWS.
{
    "Version": "2012-10-17",
    "Statement": [
        {
            "Effect": "Allow",
            "Action": [
                "ec2:StartInstances",
                "ec2:StopInstances"
            ],
            "Resource": "arn:aws:ec2:*:*:instance/*",
            "Condition": {
                "StringEquals": {
                    "ec2:ResourceTag/Env": "Production"
                }
            }
        },
        {
            "Effect": "Allow",
            "Action": "ec2:DescribeInstances",
            "Resource": "*"
        }
    ]
}

Step 2.3: Give the policy a name and click on "Create policy". The policy should be created as shown below.


Step 3: Create a Group and attach the policy to it
Step 3.1: Click on the Group tab in the left pane and click on "Create New Group".

Step 3.2: Enter the Group Name and click on "Next Step".

Step 3.3: Select the Policy which has been created earlier and click on "Next Step".

Step 3.4: Review the Group details and click on "Create Group".

Step 4: Add the user to the Group
Step 4.1: Select the Group which was created earlier. Click on "Group Actions" and "Add Users to Group" and select the user which was created earlier and click on "Add Users".


Step 5: Create EC2 instances and tag them
Step 5.1: Create two EC2 instances as mentioned here. A smaller instance is recommended as it involves less cost and that we don't be doing any processing in these instances. Click on the Tags tab and click on the "Add/Edit Tags".
Step 5.2: Enter the Tags as shown below and click on "Create Tag". For the other instance specify the Key as Env and Value as Production.

The Tags to the EC2 should appear as below. The Env column won't appear by default. Click on the Gear button on the top right and select the Env to make column visible.

Step 6: Login as the IAM User and check the actions allowed
Step 6.1: Go to the Dashboard in the IAM Management Console and grab the URL. Open the URL in a entirely different browser and enter the credentials for the IAM user.


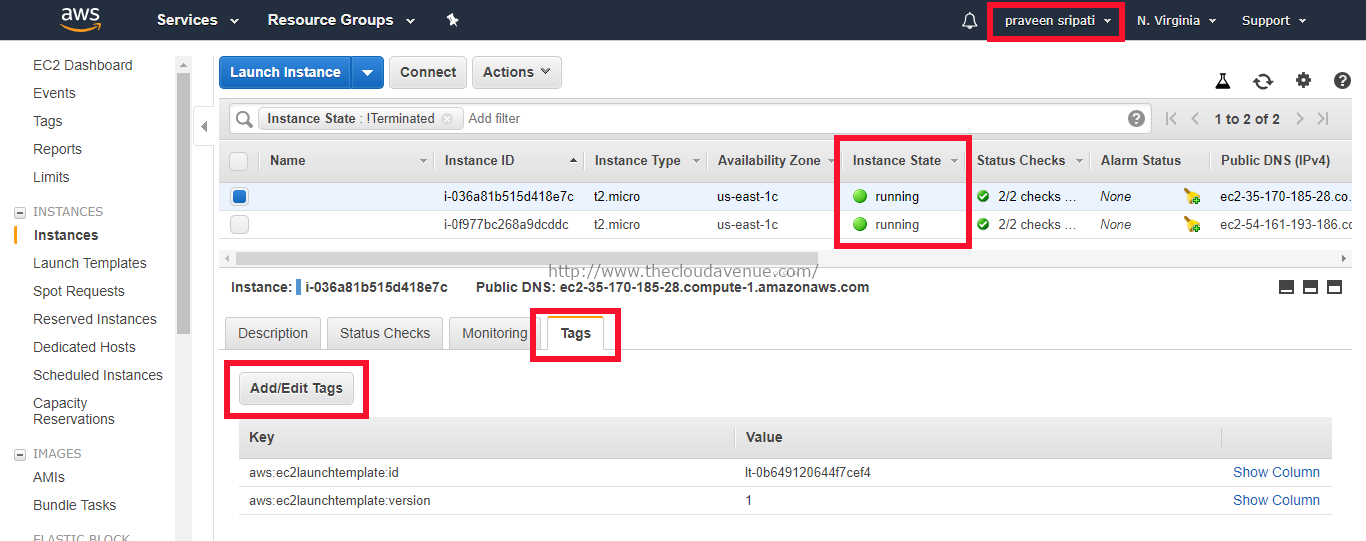
Step 6.2: Go to the EC2 Management Console. Notice the name of the user logged in the top right as highlighted below. It's the IAM User.

Step 6.3: Select the Development EC2 instance and try to terminate it as shown below. It should lead to an error. This is because the IAM user has only Stop/Start access to EC2 instance which have a Tag Env=Production and nothing else.


Step 6.4: Select the Production instance and try to Stop the instance. The user would be able to as the user has access to Stop/Start any EC2 instance with a Tag Env=Production.


Conclusion
Tagging is metadata around AWS resources like EC2, S3, RDS etc. We have seen above on how to use Tagging can be used to group EC2 resources together and give permissions to IAM Users. The same applies to other AWS resources also. Tagging also can be used to segregate the AWS billings lets says across different departments, customers, projects etc. The usage of Tagging is limited just by imagination, the different scenarios and strategies are mentioned in this AWS article.